Using ld to embed resources
It is possible to embed your mod's resources directly into your resulting DLL file. In most cases, this is preferable over shipping these resources separately or downloading them from a server on the internet.
To achieve this, we will use a tool called ld.
Background
ld is a command line tool used to link compiled objects to executables. It is part of the GNU project, and is only available on Unix-based systems as a result. However, a port for Windows exists through MinGW. We will be using MSYS2 to install MinGW.
Installation
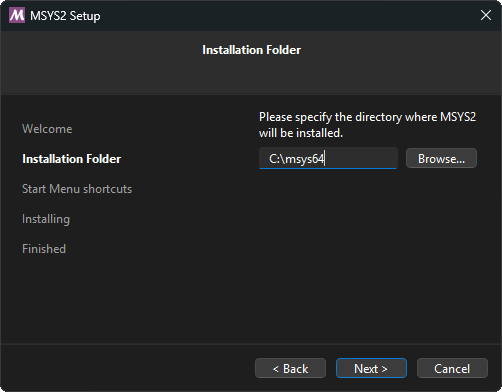
Download the MSYS2 installer from their official website. A step-by-step tutorial on how to install it exists on their website, but make sure you install MSYS2 to the default path, as this guide assumes it's installed there.
Once installed, go to your Start menu > MSYS folder > MSYS2 MSYS. Run this command to install MinGW via pacman:
$ pacman -S mingw-w64-x86_64-binutilsThe binaries for MinGW will be installed in C:\msys64\mingw64\bin. You will need to add this folder to your system PATH to use it in your project.
Again, open the Start menu, search for environment variables, and select the first result. In the Control Panel menu that appears, select "System variables...". Your PATH environment variable will be in the group labeled "System variables". Double click this variable, and add the MinGW path to it.
Ensure ld can be ran by running it in a terminal. The following output should appear:
PS C:\Users\User> ld.exe
C:\msys64\mingw64\bin\ld.exe: no input files
TIP
If you had your IDE open during installation, you must restart it so it can receive the new PATH variable.
You are now ready to use ld to embed resources.
Integrating with CMake
Using ld to embed resources into your mod involves invoking the tool at build time. This can be achieved with a custom CMake function, which you can add somewhere in your CMakeLists.txt:
function(ADD_RESOURCES out_var)
    set(result)
    foreach (in_f ${ARGN})
        file(RELATIVE_PATH src_f ${CMAKE_SOURCE_DIR} ${CMAKE_CURRENT_SOURCE_DIR}/${in_f})
        set(out_f "${PROJECT_BINARY_DIR}/${in_f}.o")
        add_custom_command(OUTPUT ${out_f}
            COMMAND ld.exe -r -b binary -o ${out_f} ${src_f}
            DEPENDS ${in_f}
            WORKING_DIRECTORY ${CMAKE_SOURCE_DIR}
            COMMENT "Building object ${out_f}"
            VERBATIM
        )
        list(APPEND result ${out_f})
    endforeach()
    set(${out_var} "${result}" PARENT_SCOPE)
endfunction()
The add_resources function is now available to use in your project, and it takes a variable as the resulting object files, followed by a list of relative paths to files you'd like to embed. For example, assuming you have a resources folder in your project:
add_resources(EMBEDDED_RESOURCES
    resources/image.png
    resources/Roboto.ttf
)
When you have a lot of files to embed, this process of adding files manually can become tedious. Luckily, this can be remedied with the file function:
# Recursively search for files in the 'resources' directory
# and add them as resources:
file(GLOB_RECURSE RESOURCES RELATIVE ${CMAKE_CURRENT_LIST_DIR} CONFIGURE_DEPENDS "resources/*")
add_resources(EMBEDDED_RESOURCES ${RESOURCES})
The add_resources function will build your resources as object files, and place them inside of the output variable you provide in the first argument. These object files must be added as sources to your project:
# Use 'target_sources' to add these object files to your project:
target_sources(project_name_here PRIVATE ${EMBEDDED_RESOURCES})

# Alternatively, they can be placed within 'add_library'
# alongside your project source files:
add_library(project_name_here SHARED ... ${EMBEDDED_RESOURCES})
Reconfigure CMake to make these embedded resources available for use within your project.
Embedded resources in code
Resources built by ld will create external definitions for their start and end positions in your binary. The names of these definitions are generated as follows:
| Example |
|---|
| resources/image.png |
| ↓ |
_binary_resources_image_png_start / _binary_resources_image_png_end |
Here, the definition begins with _binary_, followed by the path to your resource relative to your project root, with all non-alphanumeric characters replaced with underscores. At the end, _start and _end are added to mark the start and end positions respectfully. These definitions respect any capitalization of your resource file paths, making them case-sensitive.
We can use this info to write some abstractions to reference and use the data from your resources:
#include <cstddef>
#include <string>
#include <span>

#define LOAD_RESOURCE(x) extern "C" char _binary_resources_##x##_start, _binary_resources_##x##_end;
#define GET_RESOURCE(x) Resource{&_binary_resources_##x##_start, &_binary_resources_##x##_end}

struct Resource {
    Resource(const char* begin, const char* end) : _begin(begin), _end(end) {}
    [[nodiscard]] const char* data() const { return _begin; }
    [[nodiscard]] const char* begin() const { return _begin; }
    [[nodiscard]] const char* end() const { return _end; }
    [[nodiscard]] size_t size() const { return size_t(_end - _begin); }
    [[nodiscard]] std::string_view str() const { return std::string_view{this->data(), this->size()}; }
    [[nodiscard]] std::span<const std::byte> bytes() const {
        return {
            reinterpret_cast<const std::byte*>(this->begin()),
            reinterpret_cast<const std::byte*>(this->end())
        };
    }
private:
    const char* _begin;
    const char* _end;
};
TIP
The LOAD_RESOURCE and GET_RESOURCE macros assume your resources are in a folder named resources in your project. You may have to edit these macros to fit your project structure.
Example usage in your project is as follows:
// Define the external definitions for your resources.
LOAD_RESOURCE(image_png)
LOAD_RESOURCE(Roboto_ttf)

void loadResources() {
    // We can now create instances of Resource from these definitions.
    const Resource image = GET_RESOURCE(image_png)
    const Resource roboto = GET_RESOURCE(Roboto_png)

    // Pseudocode to load each resource:
    Images::load(image.data(), image.size());
    Fonts::load(roboto.data(), roboto.size());
}
You are now familiar with embedding resources into your mod!